How to make an email web app using Angular (Part V)

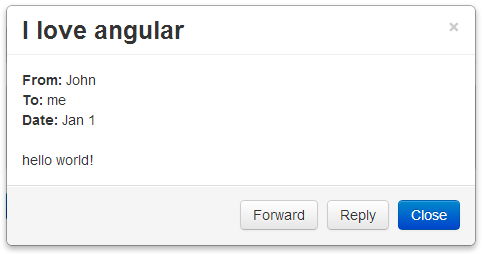
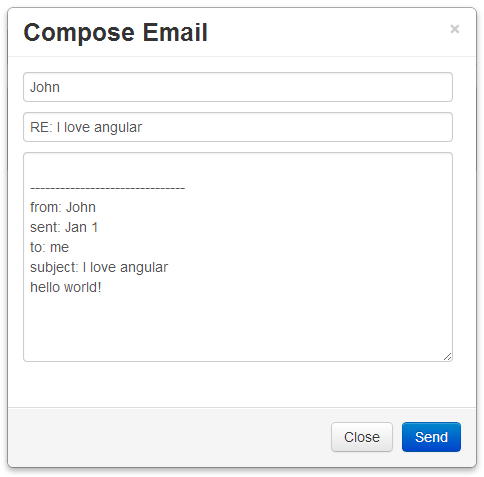
In the last post we didn’t introduce anything particularly new, instead we used what we already learned to add reply and forward functionality to the app. In terms of UI our app is now fairly complete. But before it can be a real app it has to be able to talk to a server to do the actual work of sending and storing emails. That’s what we’re going to do in this post.

Now the first thing I have to do is setup the server portion. I purposely left this post for last because I wanted you to be able to try out the Angular code without forcing you to setup a local development environment. Also I wanted it to be useful for everyone no matter what server technology they used – PHP, .NET, Node.js, etc.

Obviously I won’t be able to do that in this post. I can’t show you how to communicate with a server without a server, and that means I have to pick a technology. I’m going to use ASP.NET MVC. I will also do my best to describe the server portion in enough detail so that it’s also useful to everyone despite what server technology they use.

ASP.NET MVC Primer

A very quick primer for those not familiar with ASP.NET MVC. In this type of web application URLs are mapped to classes and methods. For example if a user entered the URL http://localhost/Home/Index in their web browser that would trigger the method Index() in the class HomeController to run.

That method can choose whether to return data or HTML. The HTML is stored in a separate file referred to as a view. These views have the extension .cshtml. Similar to the controller the proper view is selected based on the URL, once again for the URL http://localhost/Home/View it will use the view stored in the folder \Views\Home\Index.cshtml.

Of course I’m simplifying things, but this explanation should suit our purposes.

Back to the app

To start we need to create an ASP.NET MVC project in Visual Studio. I chose to start with an empty project and added a controller class called HomeController. And a action method called Index. In my view I include the CSS, JavaScript, and HTML from our last JSFiddle: http://jsfiddle.net/luisperezphd/n5AZk/

You can download this base project using this link: AngularWebApp1.zip

Now let’s update the app so that we get the email list from the server instead of hardcoding it in the JavaScript. First we’ll create the method on the ASP.NET controller:

public ActionResult GetEmails()
{
    return Json(new[] {
        new {
            from = "Riker",
            to = "me",
            subject = "Nice to meet you, Pinocchio",
            date = "Jan 8",
            body = "That and helping Data finish 'Pop Goes the Weasel'. Also counts as a CMOH."
        },
        new {
            from = "Picard",
            to = "me",
            subject = "I'm sorry, this is becoming a speech",
            date = "Jan 7",
            body = "But then I'm entitled, I'm the captain."
        },
        new {
            from = "Data",
            to = "me",
            subject = "Could you please continue...",
            date = "Jan 6",
            body = "...the petty bickering? I find it most intriguing."
        },
        new {
            from = "Troi",
            to = "me",
            subject = "But you spell knife with a 'k'",
            date = "Jan 5",
            body = "I spell 'knife' with an 'n', but then I never could spell."
        },
    });
}

In this example we’re returning a static list of emails. We’re using the Json() method to tell ASP.NET to return this data back to the browser as JSON.

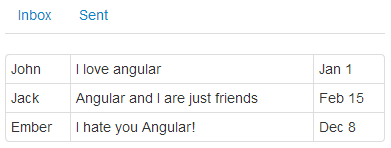
Now we’re going to replace the hardcoded list in our JavaScript with a call to this action. The JavaScript is in the view along with our HTML (/Views/Home/Index.cshtml). So replace this:
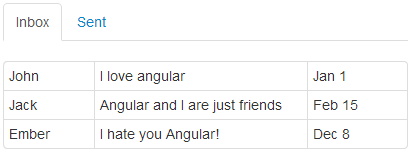
$scope.emails = [
    { 
        from: 'John',
        to: 'me',
        subject: 'I love angular',
        date: 'Jan 1',
        body: 'hello world!'
    },
    {
        from: 'Jack',
        to: 'me',
        subject: 'Angular and I are just friends', 
        date: 'Feb 15', 
        body: 'just kidding' 
    },
    { 
        from: 'Ember', 
        to: 'me',
        subject: 'I hate you Angular!', 
        date: 'Dec 8', 
        body: 'wassup dude' 
    }
];

With this:

$http.post("/Home/GetEmails").then(function(response) {
    $scope.emails = response.data;
});

Finally we need to add $http as a parameter in our Angular controller, like we did with $scope. So your controller method should be changed from this:

EmailController($scope)

to this:

EmailController($scope, $http)

That’s it, if you compile and run this you should see your email list change.

You can download the code here: AngularWebApp2.zip

Send Email

One down and one to go. Sending email is going to be very similar, the main difference is that we didn’t pass any data to GetEmails() but we need to pass the email we’re sending to SendEmail().

This method is going to be simple. All the server is going to do is populate the date and from fields of the email and send that information back to Angular. To accomplish this we are going to need two things. We need to add an action to our ASP.NET controller and a C# class to hold the data Angular is sending.

Let’s start with the C# class. It should contain all the same fields found in the JavaScript code. For our purposes you can put this class anywhere. In order to simplify things and keep all the code in one place I’m adding it as a nested class inside the controller:

public class ComposeEmail
{
    public string from { get; set; }
    public string to { get; set; }
    public string subject { get; set; }
    public string date { get; set; }
    public string body { get; set; }
}

Now for the ASP.NET action method itself:

public ActionResult SendEmail(ComposeEmail composeEmail)
{
    composeEmail.from = "me";
    composeEmail.date = DateTime.Now.ToString("MMM d");

    return Json(composeEmail);
}

Finally the call from Angular. Change the sendEmail() method from this:

$scope.sendEmail = function () {
    $scope.isComposePopupVisible = false;
    $scope.composeEmail.from = "me";
    $scope.composeEmail.date = new Date();
    $scope.sentEmails.splice(0, 0, $scope.composeEmail);
};

To this:

$scope.sendEmail = function () {
    $http.post("/Home/SendEmail", $scope.composeEmail).then(function (response) {
        $scope.isComposePopupVisible = false;
        $scope.composeEmail = response.data;
        $scope.sentEmails.splice(0, 0, $scope.composeEmail);
    });
};

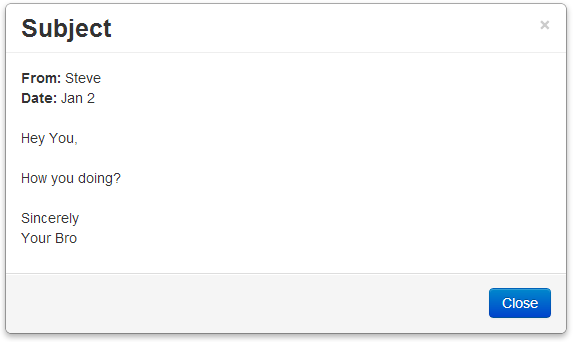
That’s it! If you run your code now, send an email and check the “Sent” tab you will see that the date is populated. If you click to open that email you will see that the “from” field is populated as well.

Download the complete source here: AngularWebApp3.zip

This covers the essentials of AngularJS and everything you need to create a functional web application. In this series you created a fairly elaborate UI with multiple screens that update dynamically. To make it functional you communicated with a backend server to do the work.

This brings us to the end of this blog series on building an email web app using AngularJS. Please use the comments below to let me know what you think.

In this blog series we’ve covered enough to build an application using AngularJS. We’re just scratching the surface of what AngularJS has to offer. In subsequent posts I dig deeper into AngularJS, including how to create more complex applications and UIs, how to use and create your own reusable components, how to structure and test your code so that it easy to maintain as your application grows.

How to make an email web app using Angular (Part IV)

So in the last post we introduced quite a bit of new concepts.

We introduced ng-model to do a two way bind between a variable and an input field. We found out that ng-click is not just for calling functions but that it also allows expressions which we used to switch tabs. We discovered the same thing about ng-show that’s it’s not limited to a boolean variable, that you could use expressions like activeTab='inbox'.

We introduced ng-class which allowed us to assign classes to an element based on whether a condition was true. Finally we used filters to format dates.

Skip to next post?

In this post we’re not going to introduce any new functionality. Instead we’re going to apply what we’ve already learned to add reply and forward functionality. If you are not interested in doing that you can skip ahead to the next post where we learn how to communicate with the server.

Next Post: How to make an email web app using Angular (Part V)

Reply and forward

In this post we’re going to add reply and forward functionality. This will make it a fairly complete email application. We are going to implement it by reusing the compose email functionality. I’ll go through it quickly since it’s pretty straight forward and doesn’t introduce any new concepts.

First we need to add the “Reply” and “Forward” buttons to the email details popup.

<a href="#" class="btn">Forward</a>
<a href="#" class="btn">Reply</a>

Should look like this: http://jsfiddle.net/luisperezphd/vFB5L/

reply-forward
Then we create the reply and forward functions on the controller:

$scope.forward = function() {
};

$scope.reply = function() {
};

Then we bind those functions to the buttons.

<a href="#" class="btn" ng-click="forward()">Forward</a>
<a href="#" class="btn" ng-click="reply()">Reply</a>

http://jsfiddle.net/luisperezphd/nbdgV/

Ok now we need to do the follow:

  • Hide the view details popup
  • Populate the composeEmail object
  • How it’s populated depends on whether it’s a reply or a forward
  • Show the compose email popup

That’s it. Here is the commented reply() function:

$scope.reply = function() {
    // hide the view details popup
    $scope.isPopupVisible = false;
    // create an empty composeEmail object the compose email popup is bound to
    $scope.composeEmail = {};
    // copy the data from selectedEmail into composeEmail
    angular.copy($scope.selectedEmail, $scope.composeEmail);

    // edit the body to prefix it with a line and the original email information
    $scope.composeEmail.body = 
        "\n-------------------------------\n" 
        + "from: " + $scope.composeEmail.from + "\n"
        + "sent: " + $scope.composeEmail.date + "\n"
        + "to: " + $scope.composeEmail.to + "\n"
        + "subject: " + $scope.composeEmail.subject + "\n"
        + $scope.composeEmail.body;

    // prefix the subject with “RE:”
    $scope.composeEmail.subject = "RE: " + $scope.composeEmail.subject;
    // the email is going to the person who sent it to us 
    // so populate the to with from
    $scope.composeEmail.to = $scope.composeEmail.from;
    // it’s coming from us
    $scope.composeEmail.from = "me";
    // show the compose email popup
    $scope.isComposePopupVisible = true;
};

When you click “Reply” the compose window should look like this:

compose-reply
The forward() is practically identical to this, the only difference is that the subject is prefixed with “FW:“ instead of “RE:” and to is blank instead of the sender.

http://jsfiddle.net/luisperezphd/b8BJ2/

Touch Ups

If you run this now you will notice 2 things. One, in the “Sent” tab, the emails are listed from top down in the order they were sent. We want to display this in the reverse order so the last email you sent shows up at the top. To do that we can change the line of code that adds composeEmail to the sentEmails array. Instead of using push() to add the email to the end of the array we will use splice() to add it to the beginning. Like so:

//$scope.sentEmails.push($scope.composeEmail); // OLD
$scope.sentEmails.splice(0,0,$scope.composeEmail); // NEW

Also if you open up one of the sent emails with all the new added text you will see that it all runs into each other. We can fix this with a little CSS. We’ll use inline CSS just this once. We’ll wrap the body of the email around a <span> tag and set the CSS white-space property to pre. This tells the browser to honor line breaks. Like so:

<span style="white-space:pre">{{selectedEmail.body}}</span>

http://jsfiddle.net/luisperezphd/n5AZk/

In the next post we are going to round out our application by looking at how to communicate with the server:

How to make an email web app using Angular (Part V)

How to make an email web app using Angular (Part III)

In the last post we created a popup that allowed us to see the contents of the emails on our email list. We introduced the ng-show and ng-click, data bound to functions, and passed parameters to those functions. As promised, in this post we will add another popup, this time to compose an email. This will be our first time using input fields.

We will start the same way we did for previous posts, by writing the HTML then adding angular code to make it functional. For our compose email popup we will need 3 fields and 2 buttons. One field for the To address, another for Subject, and one for the body of the email. One button to send and another to cancel. Our HTML looks like this:

<div class="modal">
    <div class="modal-header">
        <button type="button" class="close"">×</button>
        <h3>Compose Email</h3>
    </div>
    <div class="modal-body">
        <form>
            <input type="text" placeholder="To" style="width:95%;"><br />
            <input type="text" placeholder="Subject" style="width:95%;"><br />
            <textarea style="width:95%;" rows="10"></textarea>
        </form>
    </div>
    <div class="modal-footer">
        <a href="#" class="btn">Close</a>
        <a href="#" class="btn btn-primary">Send</a>
    </div>
</div>

The output looks like this: http://jsfiddle.net/luisperezphd/LAG2M/

compose-email-popup
Like in the previous post we want to add a variable and some functions to control the visibility. Since we covered how to do this already I won’t dive into it here. But you can see the code in the JSFiddle. In summary I did the following:

  • Add the variable isComposePopupVisible to the controller
  • Create the function showComposePopup() that sets it to true
  • Create the function closeComposePopup() that sets it to false
  • Added ng-show="isComposePopupVisible" to the modal
  • Added ng-click="closeComposePopup()" to the × and the “Close” button
  • Added a compose button under the email list: <button class="btn btn-primary">Compose</button>
  • Added ng-click="showComposePopup()" to the button

http://jsfiddle.net/luisperezphd/fYVCL/

Now we want to capture the information that the user enters, in our controller so we’re going to bind the textboxes to the fields of an object. Similar to what we did with the email popup and the selectedEmail variable.

The difference is that with the email popup we used expressions, expressions great for rendering data. In this case we are going to use the ng-model directive because it’s a two-way binding. By that I mean that if the user types in something into the input field we want the variable to automatically be updated. Likewise if the controller changes the value of one of the variables then we want the inputs to automatically updated to reflect that.

Let’s get to it. Add the composeEmail variable to the controller as an empty object, like so:

$scope.composeEmail = {};

Then update the HTML to bind to fields in this object, by adding ng-model="composeEmail.to" and ng-model="composeEmail.body" to the <input>‘s and <textarea> respectively. So it looks something like this:

<input type="text" placeholder="To" ng-model="composeEmail.to">
<input type="text" placeholder="To" ng-model="composeEmail.subject">
<textarea rows="10" ng-model="composeEmail.body"></textarea>

Now let’s confirm this is actually binding by using displaying an alert box when the user clicks the “Send” button. So let’s create a function in our controller, bind it to the “Send” button and have it display the values in the composeEmail variable. Your function should look like this:

$scope.sendEmail = function() {
    alert($scope.composeEmail.to 
        + " " + $scope.composeEmail.subject
        + " " + $scope.composeEmail.body);
};

Now let’s bind the “Send” button to it like so:

<a href="#" class="btn btn-primary" ng-click="sendEmail()">Send</a>

Now you can test it by clicking the “Compose” button, entering some information into the “To” and “Body” fields on the form and clicking “Send”. You should see whatever you typed come up in the popup.

http://jsfiddle.net/luisperezphd/9C3NX/

Now let’s add a couple of things. The first thing we want to do is make the popup disappear. To do that let’s just add $scope.isComposePopupVisible = false; in sendEmail(). Also you will notice that if you click the “Compose” button again it still has the information you entered last time. Let’s clear this by assigning an empty object to the composeEmail in the showComposePopup() function. When you are done your functions should look like this:

$scope.sendEmail = function() {
    $scope.isComposePopupVisible = false;
    alert($scope.composeEmail.to
        + " " + $scope.composeEmail.subject
        + " " + $scope.composeEmail.body);
};

$scope.showComposePopup = function() {
    $scope.composeEmail = {};
    $scope.isComposePopupVisible = true;
};

http://jsfiddle.net/luisperezphd/35zL9/

Adding Tabs

So now let’s do something a little more interesting than displaying an alert box. Normally the emails you send go into your “Sent” folder. Right now we only have the equivalent of an inbox. First let’s add a “Sent” folder and toggle between it and the “Inbox” using tabs.

Let’s start with the HTML. Add the following HTML to the top of your container:

<ul class="nav nav-tabs">
    <li><a>Inbox</a></li>
    <li><a>Sent</a></li>
</ul>

It should look like this: http://jsfiddle.net/luisperezphd/9QxLp/

email-tabs
Like everything else we’ve “angularized” we need a variable to keep track of which tab we’re in. Let’s call it activeTab, and by default let’s set it to “inbox”.

$scope.activeTab = "inbox";

Now let’s change this variable when the user clicks on “Inbox” or “Sent”. We can do that right inside ng-click, like this ng-click="activeTab='inbox'". So your HTML looks like this:

<ul class="nav nav-tabs">
    <li><a ng-click="activeTab='inbox'">Inbox</a></li>
    <li><a ng-click="activeTab='sent'">Sent</a></li>
</ul>

Now let’s only display the current email list when the activeTab is “inbox” by using the ng-show directive like so:

ng-show="activeTab=='inbox'"

So far so good. Now when you click on the “Sent” tab the email list disappears and when you click on “Inbox” it reappears: http://jsfiddle.net/luisperezphd/68fNh/

Problem is you can’t tell which tab is selected. Bootstrap has a way to show the selected tab, it requires adding the active class to the selected tab’s <li> element. See http://getbootstrap.com/2.3.2/javascript.html#tabs

So we need a way to add this class but only when the activeTab variable is set to the corresponding value. So the <li> for “Inbox” should have an active class only when activeTab is set to “inbox”. For this we use the ng-class directive. This directive takes an object, for each property in that object if the value is true it adds a class by that name.

For example in the following code angular adds the active CSS class to the <li> element:

<li ng-class="{active: true}">Inbox</li>

The result is:

<li class="active">Inbox</li>

If the value were false, the class in this case would be empty.

In our case we want to replace true with the appropriate condition like so:

<li ng-class="{active: activeTab == 'inbox'}">Inbox</li>

Your final code should look something like this:

<ul class="nav nav-tabs">
    <li ng-class="{active: activeTab == 'inbox'}">
        <a ng-click="activeTab='inbox'">Inbox</a>
    </li>
    <li ng-class="{active: activeTab == 'sent'}">
        <a ng-click="activeTab='sent'">Sent</a>
    </li>
</ul> 

And should look like this: http://jsfiddle.net/luisperezphd/KvLc2/

email-tabs-selected
Now the only thing left is to display the sent emails in the “Sent” tab. To do that we essentially need to copy the what we did for the inbox:

  • Create a variable in the controller called sentEmails assign it an empty array
  • Copy the HTML table for the email list
  • Change the ng-repeat to ng-repeat="email in sentEmails"
  • Change the ng-show condition to ng-show="activeTab=='sent'"
  • Change {{ email.from }} to {{ email.to }}

http://jsfiddle.net/luisperezphd/zvHSA/

You can do a quick test by adding objects to the sentEmails array and confirm that it shows up.

Now what we want to do is add the sent email to this array. This part is purely JavaScript, we just use JavaScript’s Array.push() function to add the composeEmail to the sentEmails array. Like so:

$scope.sentEmails.push($scope.composeEmail);

Also we can use this opportunity to remove the alert, since we can how see sent emails in the “Sent” tab. Your sendEmail() function should look like this:

$scope.sendEmail = function() {
    $scope.isComposePopupVisible = false;
    $scope.sentEmails.push($scope.composeEmail);
};

http://jsfiddle.net/luisperezphd/n3tLs/

Touch Ups

Everything should be working, there are a couple of things that we can touch up. For example after you send an email and go to the “Sent” tab you will see the date column is blank. This is because the date field is not bound to anything on the form so it’s not populated. This is as it should be because the date should be the date you sent the email. Normally this would be done on the server, for our purposes though we’ll do this on the sendEmail() function. You can simply assign the date property directly like so:

$scope.composeEmail.date = new Date();

Now if you test this by sending an email you will notice a problem right away. The date looks something like this “2013-12-27T21:47:01.678Z”. I don’t like that, I want it to look like the dates in the inbox, but those dates were strings, not actual JavaScript date objects.

http://jsfiddle.net/luisperezphd/237JF/

Luckily angular provides us with a way to format our expressions using something called “filters”. In our case we can fix how the date is displayed by changing this {{ email.date }} to this {{ email.date | date:'MMM d' }}. If you notice what we did was add | date:'MMM d' to the end of the existing expression.

The vertical line, known as a pipe (|), is how you tell angular to run a filter. The name of filter in this case is date, the colon (:) separates the filter from the parameter, and the string that follows tells the date filter how to format it. For the different ways you can format the date see the Angular documentation: http://docs.angularjs.org/api/ng.filter:date
http://jsfiddle.net/luisperezphd/UKYnz/

Alright we’re almost done with this post, just a few more things to cleanup. For example if you send an email and then click on it to see it’s content, the date on the popup is still ugly – missed a spot. The “From” field is blank because as in the case with the date before it was never assigned. Finally there is no “To” field. These are all issues we dealt with before and we know the solution to all of them.

  • Format the date using the filter by appending | date:'MMM d' at the end of the expression
  • Assigned $scope.composeEmail.from the value “me” in the sendEmail() function
  • Add “To” field and expression to the HTML
  • Assign “To” values to the sample emails in the controller

http://jsfiddle.net/luisperezphd/6gE45/

In the next post we are going to work on some of the remaining functionality to round out the application, like forwarding and replying to emails.

How to make an email web app using Angular (Part IV)

How to make an email web app using Angular (Part II)

In the first post of this series we created a table and made it data driven. In that simple example we touched on several concepts including expressions, directives, scope, and controller. We used the directives ng-app, ng-controller, ng-repeat, and ng-init.

In this post we will add the ability to click on an email and see it’s content. Just as in the last post we are going to start with the static HTML and move on to add functionality to it using Angular.

We are going to use Bootstraps standard modal HTML to create the email popup. To do that we are going to add the following HTML under your table:

<div class="modal">
    <div class="modal-header">
        <button type="button" class="close">×</button>
        <h3>Subject</h3>
    </div>
    <div class="modal-body">
        <strong>From:</strong> Steve <br />
        <strong>Date:</strong> Jan 2 <br />
        <br />
        <p>
            Hey You, <br />
            <br />
            How you doing?<br />
            <br />
            Sincerely<br />
            Your Bro
        </p>
    </div>
    <div class="modal-footer">
        <a href="#" class="btn btn-primary">Close</a>
    </div>
</div>

When you run this you should get a popup above your table that looks like this: http://jsfiddle.net/luisperezphd/6eKzx/

modal
Now we only want this popup to appear when the user clicks on an email on the list. So first we need a way to control it’s visibility. We do that by binding it to a variable, when the variable is true the popup is visible, when it’s false it’s not.

First let’s create the variable in the controller, let’s call it isPopupVisible and let’s set it to false. Like so:

$scope.isPopupVisible = false;

Your controller should look something like this:

function EmailController($scope) {
    $scope.isPopupVisible = false;

    $scope.emails = [
       { from: 'John', subject: 'I love angular', date: 'Jan 1' },
       { from: 'Jack', subject: 'Angular and I are just friends', date: 'Feb 15' },
       { from: 'Ember', subject: 'I hate you Angular!', date: 'Dec 8' }
    ];
}

Now we add the ng-show directive and bind it to that variable. To do that add the following directive to your div with the modal class:

ng-show="isPopupVisible"

It should look like this:

<div class="modal" ng-show="isPopupVisible">

Now that we have bound the visibility of the popup to the isPopupVisible variable we need a way to set that variable to true. So let’s wire up that click event to the list. First let’s create a function that sets that variable to true, let’s call it showPopup(), like so:

$scope.showPopup = function () {
    $scope.isPopupVisible = true;
};

Your controller should now look like this:

function EmailController($scope) {
    $scope.isPopupVisible = false;

    $scope.showPopup = function () {
        $scope.isPopupVisible = true;
    };

    $scope.emails = [
       { from: 'John', subject: 'I love angular', date: 'Jan 1' },
       { from: 'Jack', subject: 'Angular and I are just friends', date: 'Feb 15' },
       { from: 'Ember', subject: 'I hate you Angular!', date: 'Dec 8' }
    ];
}

Since each email corresponds to a row let’s do it at the row level. We’ll use use Angular’s ng-click directive, like so to call this function from each row:

ng-click=”showPopup()”

So that your <tr> tag looks like this:

<tr ng-repeat="email in emails" ng-click="showPopup()">

Now before this will work we will have to do one more thing. If you remember from the last post ng-controller applies a controller to the element it’s own and it’s child elements. In the last post we placed it on the <table>, but since the modal HTML is outside that table we need to move this directive on level up to the container. Your container <div> should look like this:

<div class="container" ng-app ng-controller="EmailController">

There now you have a popup that comes up when you click on an email: http://jsfiddle.net/luisperezphd/T5txH/

You will probably notice right away that there is no way to close it. Let’s fix that. Let’s create another function called closePopup() that sets isPopupVisible to false. Then let’s add an ng-click directive to the × and the close button that calls that function. Do that and you should get this: http://jsfiddle.net/luisperezphd/wLA78/

Great, now we have a popup that opens and closes. Now let’s get it to display the contents of the email. To accomplish that we are going to have to modify showPopup() to include a parameter for us to pass the email we want to display. Then we need to store that email in a variable and bind to the popup. And finally we need to pass the email to the function when the user clicks on the list.

So modify the function to look like this:

$scope.showPopup = function (email) {
    $scope.isPopupVisible = true;
    $scope.selectedEmail = email;
};

Then modify the markup for your modal to use the data from selectedEmail. It should change from this:

<div class="modal" ng-show="isPopupVisible">
    <div class="modal-header">
        <button type="button" class="close" ng-click="closePopup()">×</button>
        <h3>Subject</h3>
    </div>
    <div class="modal-body">
        <strong>From:</strong> Steve <br />
        <strong>Date:</strong> Jan 2 <br />
        <br />
        <p>
            Hey You, <br />
            <br />
            How you doing?<br />
            <br />
            Sincerely<br />
            Your Bro
        </p>
    </div>
    <div class="modal-footer">
        <a href="#" class="btn btn-primary" ng-click="closePopup()">Close</a>
    </div>
</div>

To this:

<div class="modal" ng-show="isPopupVisible">
    <div class="modal-header">
        <button type="button" class="close" ng-click="closePopup()">×</button>
        <h3>{{selectedEmail.subject}}</h3>
    </div>
    <div class="modal-body">
        <strong>From:</strong> {{selectedEmail.from}} <br />
        <strong>Date:</strong> {{selectedEmail.date}} <br />
        <br />
        <p>
            Hey You, <br />
            <br />
            How you doing?<br />
            <br />
            Sincerely<br />
            Your Bro
        </p>
    </div>
    <div class="modal-footer">
        <a href="#" class="btn btn-primary" ng-click="closePopup()">Close</a>
    </div>
</div>

Finally change the call to showPopup() in the table to pass the email. Like so:

ng-click="showPopup(email)"

Your <tr> tag should look like this:

<tr ng-repeat="email in emails" ng-click="showPopup(email)">

Note that email is the name we assigned in ng-repeat.

Now when you click on it the popup will display the content of the email you clicked on: http://jsfiddle.net/luisperezphd/hLgjd/

The only thing we don’t display is the email body, that’s because we hadn’t created that data. Let’s do that now. Let’s modify the array of emails to include an email body.

$scope.emails = [
    { 
        from: 'John', 
        subject: 'I love angular', 
        date: 'Jan 1', 
        body: 'hello world!'
    },
    { 
        from: 'Jack', 
        subject: 'Angular and I are just friends', 
        date: 'Feb 15', 
        body: 'just kidding'
    },
    { 
        from: 'Ember', 
        subject: 'I hate you Angular!', 
        date: 'Dec 8', 
        body: 'wassup dude'
    }
];

Now update the markup for the modal so that it displays that copy in the body: http://jsfiddle.net/luisperezphd/Z2xuh/

In the next post we will add functionality to compose an email.

How to make an email web app using Angular (Part III)

How to make an email web app using Angular

We are going to create an email application using Angular JS. First we’re going to build the front end and wait to add the server portion till the end.

We’re going to learn angular by diving right in and explaining concepts as we go as we need to. Until we need the server portion, we are going to mock that data in right in the code. I think this is not only a good way to learn, it’s a good way to go about building an application.

[Read more…]