AngularJS Game Programming: Making Minesweeper (Part IV)

angularjs-game-programming-making-minesweeper-blog-part-iv

Last time on “AngularJS Game Programming”: We added graphics to a basic working minefield that allows you to uncover blocks. In this post we’re going to add mines!

Adding Mines

Ok, now we’re ready to add mines to the minefield. First let’s write the code to place a single random mine. Let’s start by calculating the row and column where the mine will be placed:

var row = Math.round(Math.random() * 8);
var column = Math.round(Math.random() * 8);

Then we need a way to retrieve information about that spot so that we can indicate there’s a mine there:

function getSpot(minefield, row, column) {
    return minefield.rows[row].spots[column];
}

Now we need a way to store that information somehow. Let’s create a property in the spot and set it to either “empty” or “mine”. Our mine placing function should look like this:

function placeRandomMine(minefield) {
    var row = Math.round(Math.random() * 8);
    var column = Math.round(Math.random() * 8);
    var spot = getSpot(minefield, row, column);
    spot.content = "mine";
}

Now we need to update the createMinefield() function so that it initially sets content to “empty”.

var spot = {};
spot.isCovered = true;
spot.content = "empty"; // new
row.spots.push(spot);

Now we need a way to display it. The spot should look empty if content is set to “empty” and isCovered is false. You should see a mine if isCovered is set to false and content is set to “mine”.

Your td should now look like this:

<td ng-repeat="spot in row.spots" ng-click="spot.isCovered = false">
    <img ng-if="spot.isCovered" src="block.png">
    <img ng-if="!spot.isCovered && spot.content == 'empty'" src="empty.png">
    <img ng-if="!spot.isCovered && spot.content == 'mine'" src="mine.png">
</td>

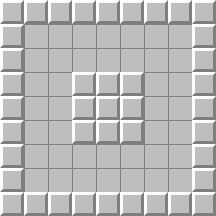
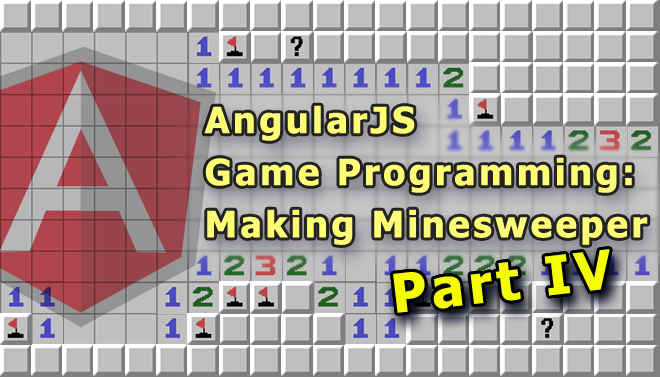
Let’s do a quick test by placing one mine in the minefield. Update the createMinefield() to call placeRandomMine(). Then click to uncover the blocks until you find it – it might take a while:

minesweeper-minefield-one-mine

Play with it at: http://jsfiddle.net/luisperezphd/Ap8Xp/

More Mines

Let’s add a function to place more mines. Name it placeManyRandomMines() and have it call placeRandomMine() 10 times:

function placeManyRandomMines(minefield) {
    for(var i = 0; i < 10; i++) {
        placeRandomMine(minefield);
    }
}

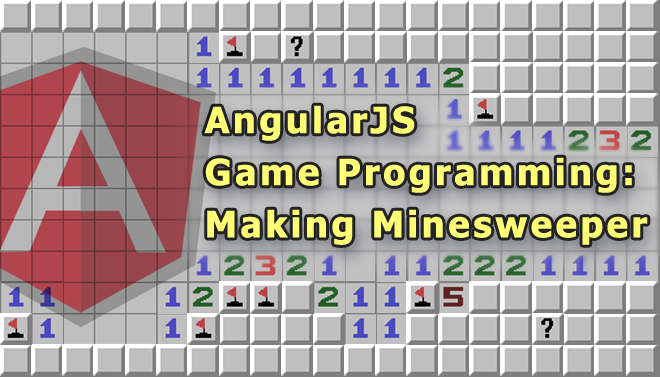
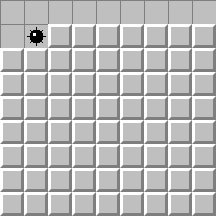
Update createMinefield() to call this function instead of the previous one that only places one mine. Again test it by clicking on the blocks until you uncover several mines:

minesweeper-minefield-many-mines

Play with it at: http://jsfiddle.net/luisperezphd/V5pwz/

Next Time

In the next post we’re going to add numbers and get one step closer to the full game.

Next Post: Adding Numbers

AngularJS Game Programming: Making Minesweeper (Part III)

angularjs-game-programming-making-minesweeper-blog-part-iii

Last time on “AngularJS Game Programming”: We created a minefield using Angular, but it was ugly, real ugly. In this post we’re going to make it look and work more like the real thing.

Uncovering spots

Let’s add some basic interaction. When the player clicks a spot that spot should be uncovered. Which in this case means isCovered should be set to false. To do that we add the ngClick directive to the td. Like so:

ng-click="spot.isCovered = false"

So that our td looks like this:

<td ng-repeat="spot in row.spots" ng-click="spot.isCovered = false">

Because we display the value of isCovered in our cell with the {{isCovered}} expression we should see it change from true to false when we click on it.

Play with it at: http://jsfiddle.net/luisperezphd/z5rg3/

Make it look like a game

While it’s working, it’s not very obvious what’s going on. There are so many words and they are so close together that it’s hard to tell at a glance whether it says “true” or “false”. Also it just doesn’t look like a game.

Let’s change that, let’s add some graphics.

If a spot is covered we want to show a raised block. If it’s empty we want it to look empty. We’ll need an image for each and the right AngularJS logic. Namely the ngIf directive. We’re going to add two image tags and apply the ngIf directive to each one with an expression that checks isCovered. The code in the td should look like this:

<img ng-if="spot.isCovered" src="covered.png">
<img ng-if="!spot.isCovered" src="empty.png">

We’re also going to add some CSS to our minefield table so that the images are right next to each other with no space between them. Basically we want remove any padding in the table cells and any space between them.

To do that we need to add the minefield class to the table and the following CSS:

.minefield {
    line-height:0;
    border-spacing:0;
}

.minefield td {
    padding:0
}

With this code in place if you start clicking on spots you should see the blocks disappear. Here’s an example:

look-like-minesweeper-minefield

Play with it at: http://jsfiddle.net/luisperezphd/DFgFa/

I’ve already created the images for you. If you need the files because you are doing it locally you can download the images using this link angularjs-minesweeper-game.zip. I also made the images available online, that’s what I’m using for the JSFiddle. The base address is:

http://luis-perez.s3-us-west-2.amazonaws.com/angularjs-minesweeper-game/

Next Time

In the next post we’re going to start getting dangerous and add mines all over the place.

Next Post: Adding Mines!

AngularJS Game Programming: Making Minesweeper (Part II)

angularjs-game-programming-making-minesweeper-blog-part-ii

Last time on “AngularJS Game Programming”: We covered the game elements in minesweeper. In this post we’re going to start diving into writing the code.

Setup AngularJS

First we need setup AngularJS. This means including the AngularJS JavaScript file, creating a controller and wiring it up to the HTML. This is what that looks like:

<!DOCTYPE html>
<html ng-app>
  <head>
      <script src="http://ajax.googleapis.com/ajax/libs/angularjs/1.2.6/angular.min.js"></script>
      <script>
      function MinesweeperController($scope) {
          // code goes here
      });
      </script>
  </head>
    <body ng-controller="MinesweeperController">
    </body>
</html>

You can play around with the code here: http://jsfiddle.net/luisperezphd/vheyL/

I’m assuming you already have at least some exposure to Angular. If you want to dig deeper into controllers and directives in AngularJS first you can take a look at my step by step walkthrough blog post series at: How to make an email web app using Angular.

Code the Minefield

We’re going to program the game in the order I described it in the first post. Starting with the minefield. The minefield is a fixed grid of rows and columns. To model it we’re going to create an array of rows and populate each row with an array of spots.

The spots are going to be objects that keep track of the state of that particular spot on the grid. For example the spot object will keep track of whether that spot has been uncovered. Here is the code that will create the model of the 9 by 9 minefield:

function createMinefield() {
    var minefield = {};
    minefield.rows = [];
    
    for(var i = 0; i < 9; i++) {
        var row = {};
        row.spots = [];
        
        for(var j = 0; j < 9; j++) {
            var spot = {};
            spot.isRevealed = false;
            row.spots.push(spot);
        }
        
        minefield.rows.push(row);
    }
    
    return minefield;
}

Now we’ll assign the minefield to a variable in the $scope so we can access it from the HTML. So in our controller we’re going to add this line:

$scope.minefield = createMinefield();

Then in our HTML we’re going to bind our minefield data to an HTML table, repeating the table row for each row in our mine field, and repeating the <td> for each spot in our row. Like so:

<table border="1">
    <tr ng-repeat="row in minefield.rows">
        <td ng-repeat="spot in row.spots">
            {{spot.isCovered}}
        </td>
    </tr>
</table>

Our output should look like this:

true-false-minesweeper-minefield

It’s not the prettiest minefield I’ve ever seen but it’s a start.

Play with it at: http://jsfiddle.net/luisperezphd/QY4AL/

Next Time

In the next post we will add code that will allow us to uncover the posts. And we’ll add graphics to make it look more like a game.

Next: Making it look like the real thing